Bigger is Better & Twice is Nice

Greetings from the Northwoods, and happy June! Spring arrives a little later here, but after a mix of some cool, damp weather, and some warm, sunny weather, things have really popped in the last couple of weeks.

After talking about it for over a year, my husband and I have finally doubled the size of our vegetable garden – actually more than doubled! It required some extra work, but there are three main things that we decided to do differently from how we built the original raised beds 2 years ago.

My schematic design for the raised beds
  1. Width of beds. The initial design was horseshoe shaped, 4 feet wide, and fenced in at the outer edge. This made it impossible to reach all of the planting area without walking on the beds. I have since learned that it’s better not to step on the soil because compaction is not desired. The new beds are somewhat of a reflection of the old beds, but altered to be a 2 foot wide horseshoe with a separate 4×10 bed set within the interior void. This way I am able to reach into the new beds from the aisles.
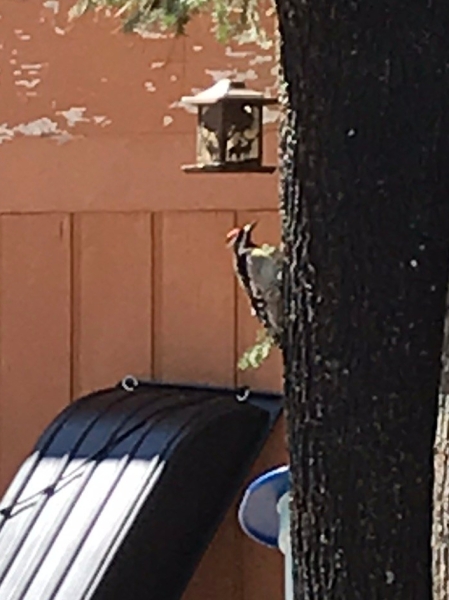
  2. Height of fence. When we first built our garden, I was a little paranoid of wildlife invaders. We do live in the woods and there are a lot of critters roaming around. For that reason, we chose to bury the fence so that nobody would be able to dig their way in. This resulted in a 5 foot tall fence. Since I also attached bird netting over the top, we would always be ducking down or getting our hats, hair clips, and sunglasses caught in the netting. In reality, the greatest value of the fence is keeping our own dogs out of the garden. They keep a significant portion of wildlife out of our backyard. For example, I’ve never seen a deer on our property in the 2.5 years that I’ve lived here, and this is very much white-tailed deer country. I have seen turkeys parade by our house, but only when the dogs are all inside. Plus, I’m sure there are voles that could enter underground anyway. So this time around, we decided not to bury any fence, and let it stand at just over 6 feet tall. I happen to like being able to use the fence as a trellis, and we just like how it looks this way – so we redid the fence all around the old and new beds to be a foot higher.
  3. Weed cloth. It would have been preferred to deal with the existing grass and weeds before installing the beds, because tilling and solarizing would have been much more effective measures for weed control. But I’m still learning, and I’ve already gone and put down weed cloth for the aisles between/borders around the beds, and then shredded cedar mulch on top of that. I think our quackgrass is still going to pop through, but hopefully it will be less than what I had coming through the thick layer of woodchips that I used last year.

We also added a few more beds (made from kits) outside of the fenced-in area. In these I am trying to establish some perennial patches – including asparagus and rhubarb.

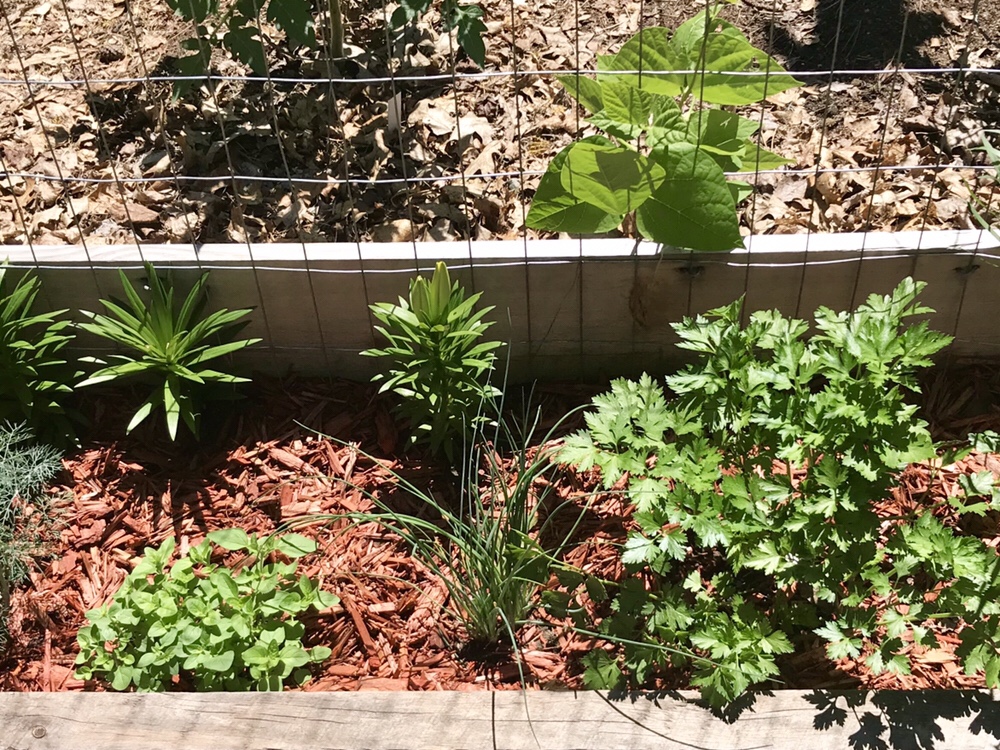
The garlic that I planted in October is looking great. Alaskan peas seem to be happy. I also have lettuce, onions, celery, tomatoes, tomatillos, peppers, and one lonesome artichoke, kale, and swiss chard already planted. The tomatoes and peppers have needed protection from some chilly nighttime conditions, but I think we’re now in the clear.

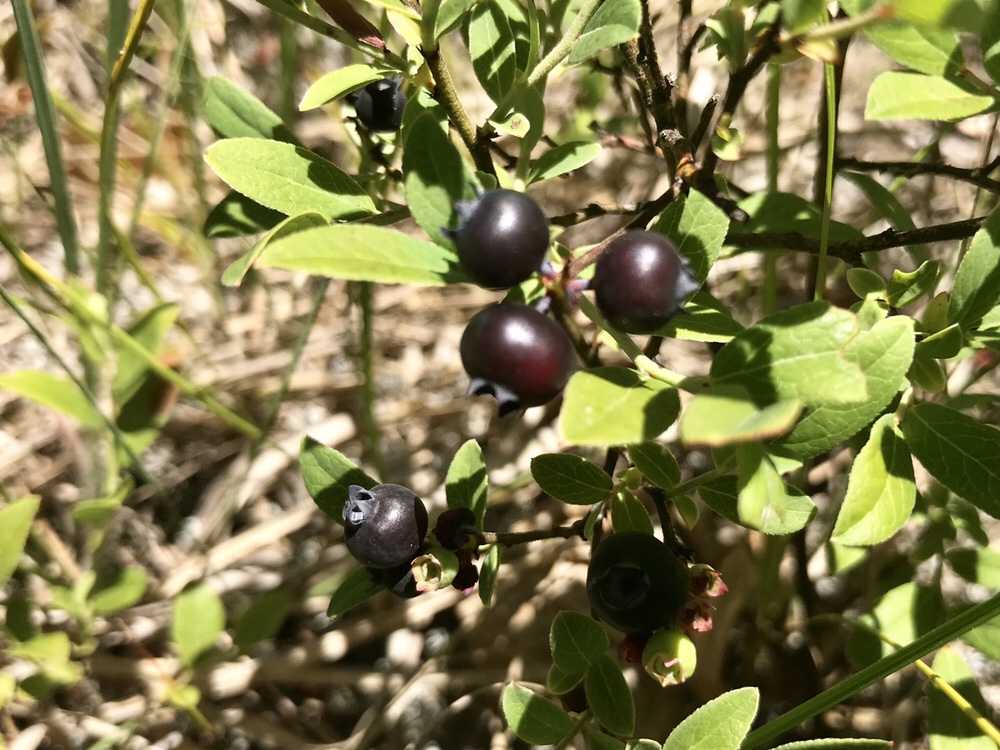
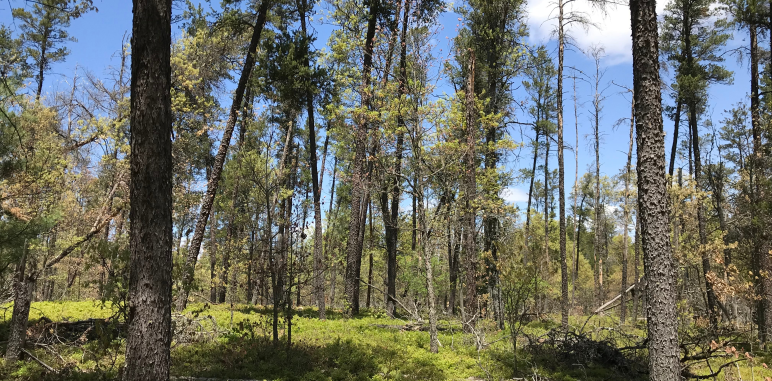
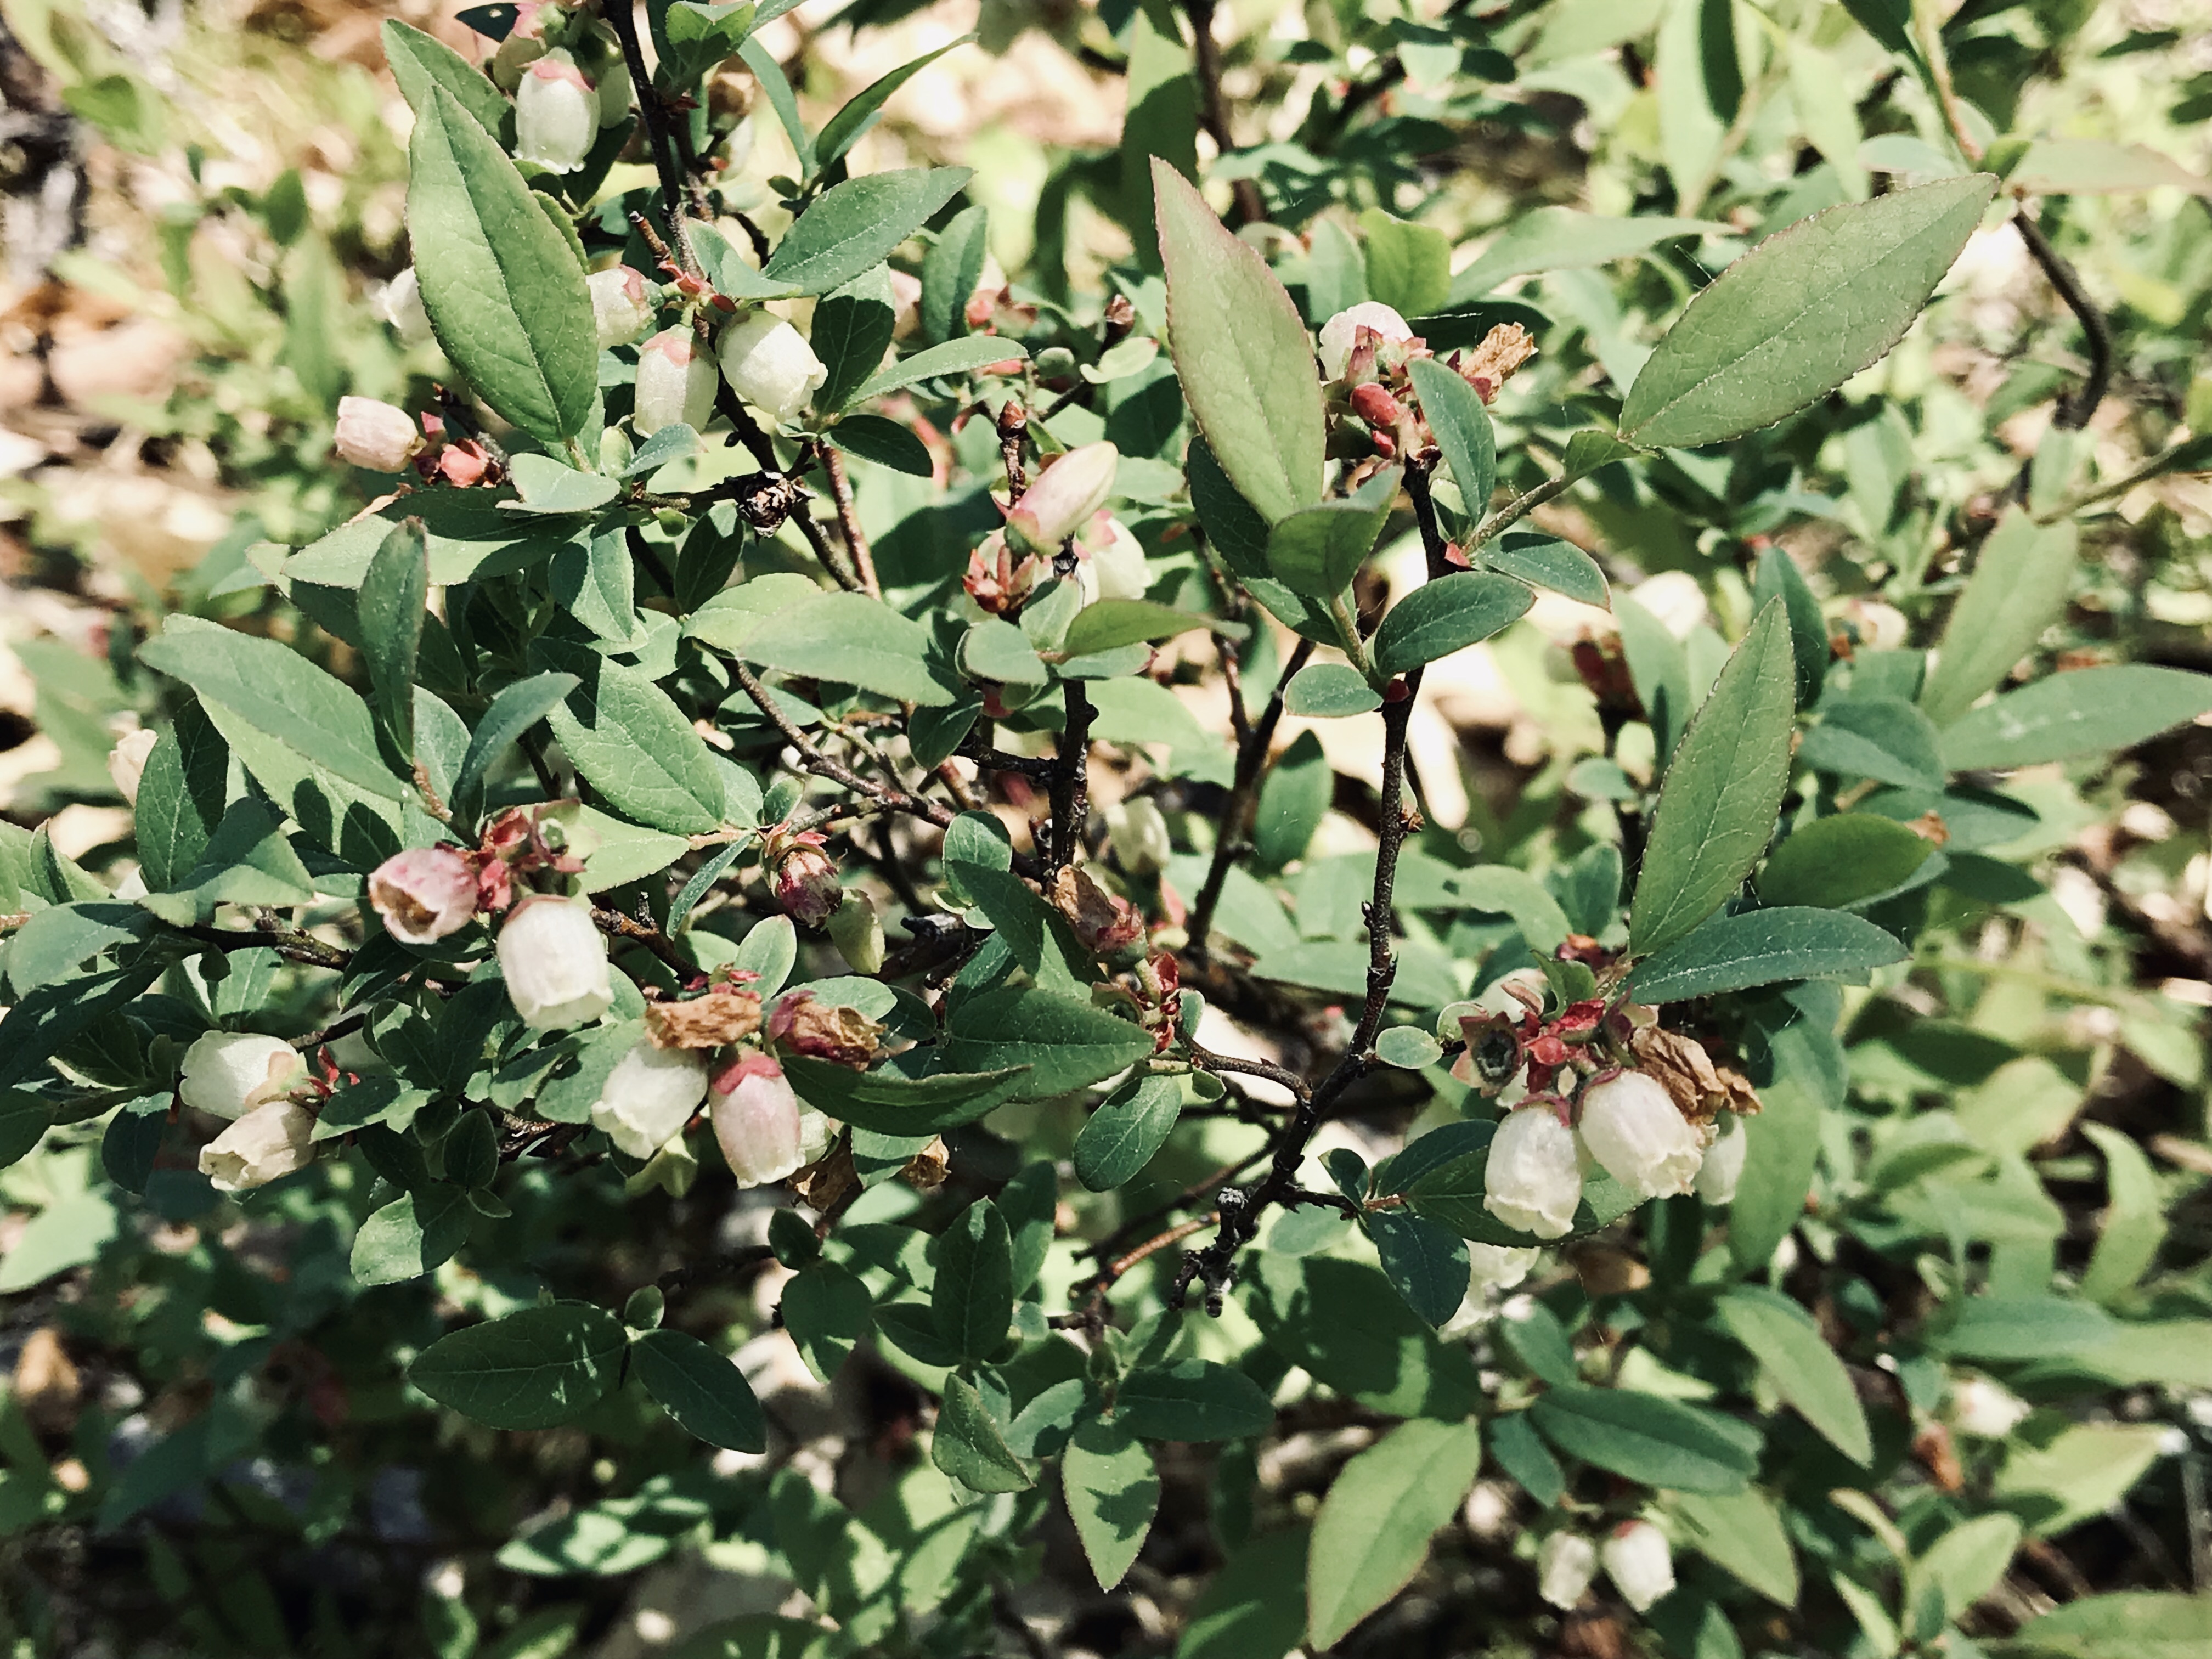
Not sure if I already mentioned it here, but late last summer we also doubled the size of our property! We went from 2.5 acres to 5 acres. The additional land was a vacant lot directly south of ours – basically as far as the eye can see from the vantage point in the above picture! It’s totally wild, flush with scraggly jack pines and pin oaks (and good number of standing dead oaks that will be harvested as firewood). The forest floor is carpeted with wintergreen and an abundance of blueberry bushes. There are plenty of other species that I have yet to identify, like mosses, ferns, other pine trees, and choke cherries.

I was conjuring visions for a magical woodland garden in this new space, right until it appeared all on its own in the form of a giant patch of Pink lady’s slippers. I staked out the area so we can avoid disturbing these native Spring ephemerals, because we intend on doing some forest management this summer. I am still developing ideas of exactly what I want to cultivate on our new property, but I am anxious to try my hand at “farming the woods.”

Last but not least, I also got two more grow lights for my indoor setup. Since March, I’ve been busy getting things prepped for this year’s larger vegetable garden. Hopefully this is the week that I will be able to get everything out of the basement, hardened off and transplanted, or directly sown into the ground.

The most tender plants that I’m concerned about are the beautiful ginger rhizomes that I have started. They really like being on the heat mat, so for them I’m looking for nighttime temps of 55 F or above. This is also the crop that I’m most excited about, although I’m trying not to get my hopes up too high because I do realize that this is pushing the limit for what can be grown in Zone 4b.
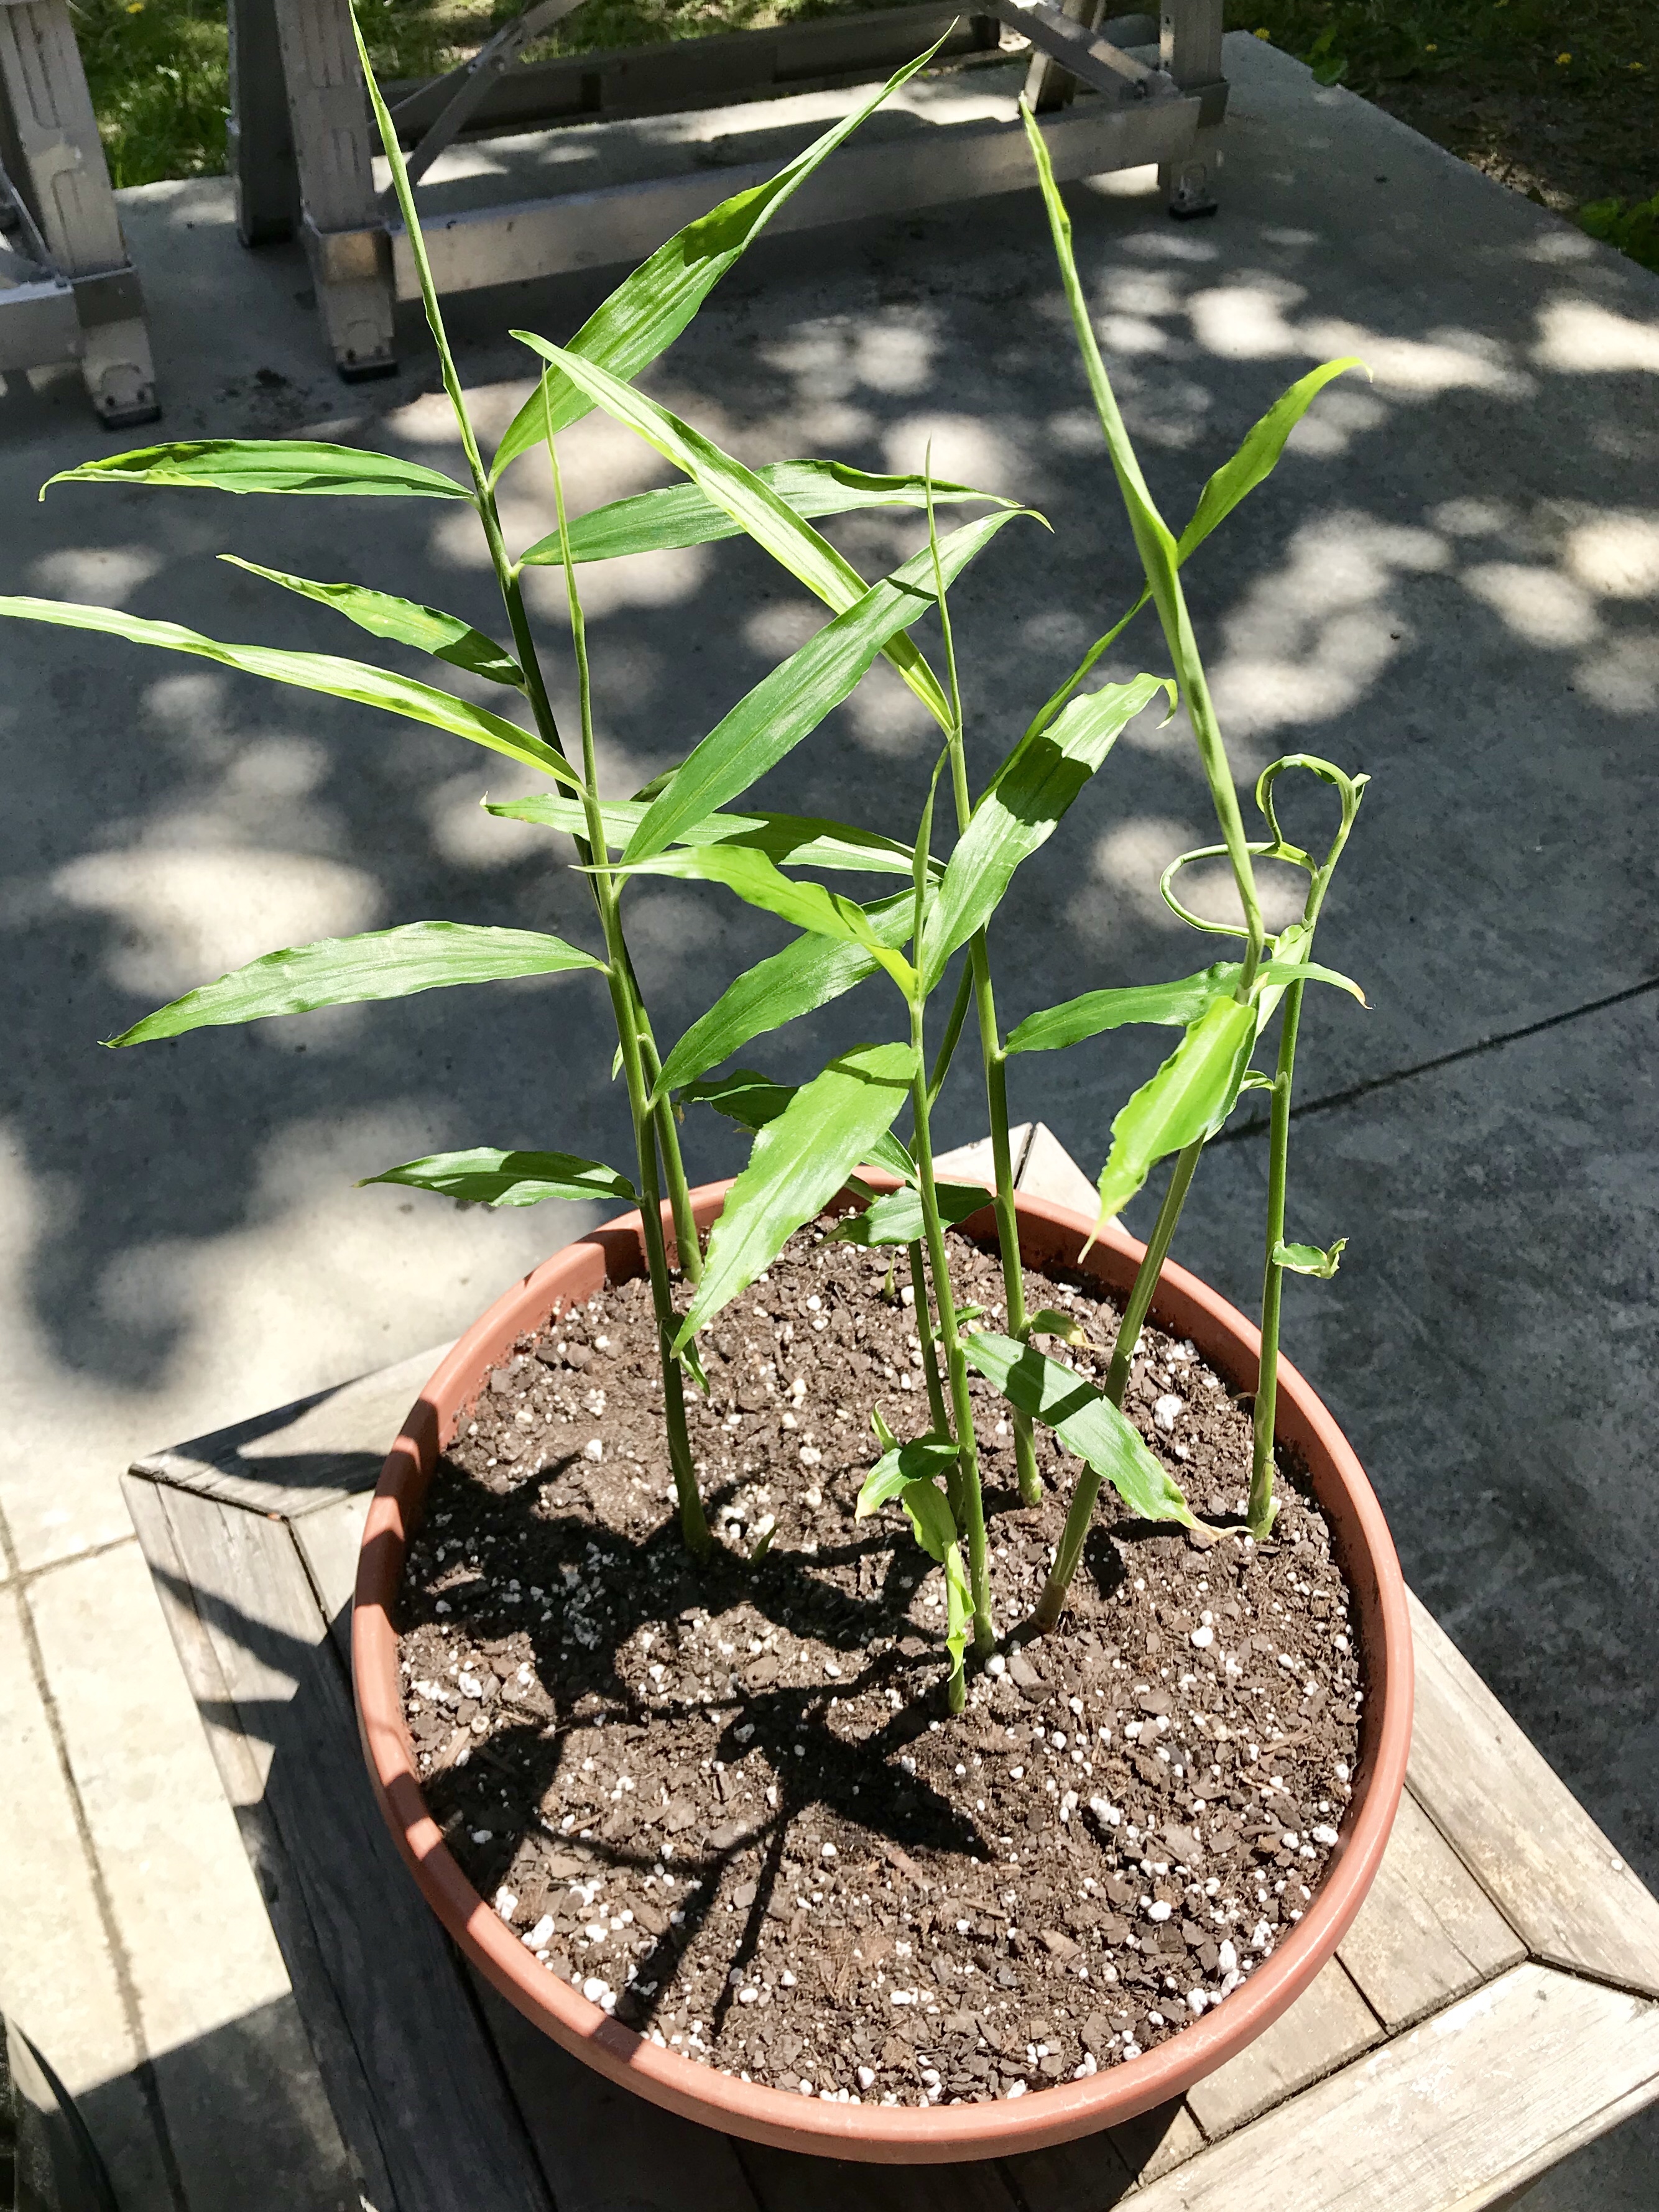
Jackpine Savage Syrup

We just finished up our 3rd batch of syrup, and it seems that the maple tapping season is at its end. For the record we put 6 taps into 5 trees – 2 sugar maple and 3 red maple. We started with 3 buckets on March 12. It didn’t really start dripping until a week later, so we had time to increase our operation to 6 buckets. Our final haul was April 15 and it was one of our biggest. The next day, the buckets were virtually dry. I’d guess we collected approximately 60 gallons of sap over the course of a month. We cooked it down in 3 batches, in a 20 gallon pot, outdoors on a propane turkey-fryer setup. Then we finished it indoors in a 4 gallon stock pot on our gas stove. The final product was 15 pints of syrup – which probably would have been a complete 2 gallons if we weren’t tasting it so much… but it’s just insanely delicious stuff.

Tapping trees is a labor of love! First, one must identify the appropriate tree. Then one can drill a special hole and hang a bucket to collect the distinctly pure tasting water that drips out of the tree’s wound. The conditions need to be just right for the sap to flow, occurring usually on sunny days when snow is still on the ground, with daytime temps in the 40s, and nighttime lows in the 20s.

IMG_5364I guess it makes sense that the yellow-bellied sapsucker is also a sign of good conditions. I was delighted to see this one tapping away on one of our sugar maples.

We are fortunate to have two sugar maples right behind our house. The convenience is great, but collecting sap from trees in a remote area can be an enjoyable chore. Four of our taps were in red maples on our friend’s property that was accessible only by ski or snowshoe for a majority of the tapping season. Maple trees are not super prevalent in this part of Michigan so we had to put in the extra effort to reap the benefits of additional trees, and it was most definitely worth it. In each bucket we would find between one tablespoon and two gallons of sap each day or every few days. We kept a close eye on the weather to know when the buckets would be filling up. The rate at which the sap flows is definitely not constant. The trees will heal themselves after we remove the metal spiles.


For each batch, cooking down the sap into syrup was a two day job for us. It took several hours for the liquid to decrease in volume significantly. Then we brought it indoors and continued boiling until the sap became syrup at approximately 7.5 degrees F above the boiling point of water (adjusted for elevation and pressure.) Our three batches resulted in a slightly different flavors and slightly different colors. The first two were on the lighter side with strong notes of Vanilla, while the third batch was much darker with a deeper Butterscotch flavor. We’re calling our stuff Jackpine Savage Syrup, in reference to our most prevalent tree, the Jack pine, and the Up North lifestyle that we love.

IMG_5151

Fall 2018/Spring 2019

The new season is upon us here in Northern Michigan. I’m very happy because my garlic has already sprouted. I planted it last October right after we got home from our wedding in Connecticut. It has been exactly 6 months since we got married, and our 2019 garden is now in progress – mostly sprouting in our basement under grow lights.

Some things I did not rip out of the beds, such as kale. I’m glad that I didn’t, because I am now learning about no-till practices and beginning to understand how live root systems can actually contribute to better soil health. And it’s always impressive to observe anything and everything that survives our deep freezes.  The lowest reading we saw this year was -38 degrees Fahrenheit.

I’ve got lots of catching up to do here, since I did not post anything since July. I will just flashback to some of my images that I posted on Instagram last summer, as well as some unpublished ones, so I can move on to new topics!

Mid-July Update

The grass is brown but the garden is green! It was a bit of a slow start, and then we got stunned by some serious heat. But we still have a ways to go. Some of my cooler weather crops are bolting too early, but most things are finally starting to pop off. In no particular order, here is an overview of the progress of this year’s plantings up to this point in the season.

First we must notice the peppers. I have close to 30 pepper plants. That Jalapeno plant is dripping with little fruits.  Also pictured are Ring of Fire, Cajun Belle, and Shishito. I counted at least 15 Cajun Belles on one plant already. Not shown are the Super Chilies and Buena Mulata, but they are fruiting too! Super chilies pop up like little Christmas lights. Buena Mulatas start out a pale yellow.

My herb garden has been very productive. I planted a specific variety so I could make my own Herbs de Provence – Savory, Marjoram, Thyme, Rosemary, and Oregano. I’ve been harvesting batches of those and drying them in the oven. I also dried some Sage and Celery tops for winter cooking. And Lavender too. I started a second round of Basil and Dill – since those were already starting to bolt, as well as Cilantro – because I’m going to need that for making salsa with all our peppers. I also started some more Parsley because I love using it in curried chicken salad – with lots of celery.

I harvested a cucumber and made refrigerator pickles, following this recipe: https://selfproclaimedfoodie.com/easy-refrigerator-dill-pickles/  I used the recommended fresh dill, slightly less garlic, and fewer peppercorns. Also added some mustard seeds, and dried super chilies from last year’s garden. Haven’t tasted them yet, but do have an extra jar of brine just waiting for this next little guy to grow up.

I moved my cantaloupe away from the cucumber so they don’t cross pollinate. I have two plants in my container and they are going wild. I might need to figure out a trellis or something for these babies. So many flowers! Look at that tiny melon! You can clearly see the difference between female and male flowers here. Female has the fat, swollen stem that will become a cantaloupe. Male has the skinny stem.

I am a little late to the Zucchini party but they are getting going. I’m sure we’ll see blossoms in no time. Also have Nasturtiums there – still not flowering, sadly. But my Lilies came up, and Calla Lilies are on their way too! That’s exciting.

I started some Hostas, Ferns, and Astilbes in containers to get established for next year. Ferns never came up. Hostas are still small, but look healthy. Astilbes are growing really well, but are not shown because they are in temporary pots sitting in the front flower bed that has reverted back to dog lounging pit. We also put in a Cherry tree and two Lilacs – to enjoy next year.

I’ve been harvesting lots of lettuce. Mustard and Arugula are both going to seed already, but are still edible. Classic Cesar salad is our favorite, so Romaine lettuce is a must. I thinned out my lettuce crops and I am hoping to get some actual heads to form there. Also thinned out beets. Enjoyed those beet tops sauteed with a little garlic – yum! You can see my little onions and carrots in front of the beets. Haven’t been eating nearly as much Chard as last year, or Kale. But I made some fabulous Kale chips! I may move my Kale and Chard to a spot in the raised beds. They just don’t seem as productive in containers. Or maybe it’s been the heat? Not sure.

A very small head of Broccoli has started to form.  I don’t think it will get much bigger, because we had that heat wave. I have to remember to get my Brassicas planted earlier in the Spring next year or start them later for the Fall. Brussels sprouts and cabbage look good though. Celery is doing fantastic. Fennel wants to bolt.

We ate our first hand full of ground cherries today! What a unique delight. I’m attempting to train them up trellises so they don’t take up too much area.  No ripe tomatoes yet, but lots on their way. I have 9 Tomato plants.

That covers most of the bases. We are extremely happy with the garden so far! Just the right balance of successes and learning experiences and outright miracles.

Red, White, and Blue Salad

As Americans come together to memorialize the founding of the United States, I would like to memorialize this salad that I made to pair with grilled duck breasts – so I don’t forget how well this combination turned out, and because the timing is perfect for coordinating fresh ingredients with festive holiday colors. I only used what I had on hand, which included red: radishes, red romaine, and red mustard, white: mozzarella cheese, and blue: wild blueberries.


It’s my first time growing radishes (which can be sowed directly in the ground), and I can’t believe how fast they grow! I’m really glad I decided to plant them, because they’re so productive, delicious, and a little different. I got to enjoy the micro greens first, and have been harvesting good sized radishes for a couple of weeks now. I planted them together with beets as was recommended on the seed packet. After I pick all the radishes, I will harvest some micro beet tops, and then the beets will have room to grow. I might try to find space to sow another row of radishes because we just love the spicy kick. I bought one packet of each Early Scarlet Globe Radish and Detroit Dark Red Beet at my local grocery store. They really do a great job of carrying seeds that are adapted to the area and I’m thankful for that.

img_9403
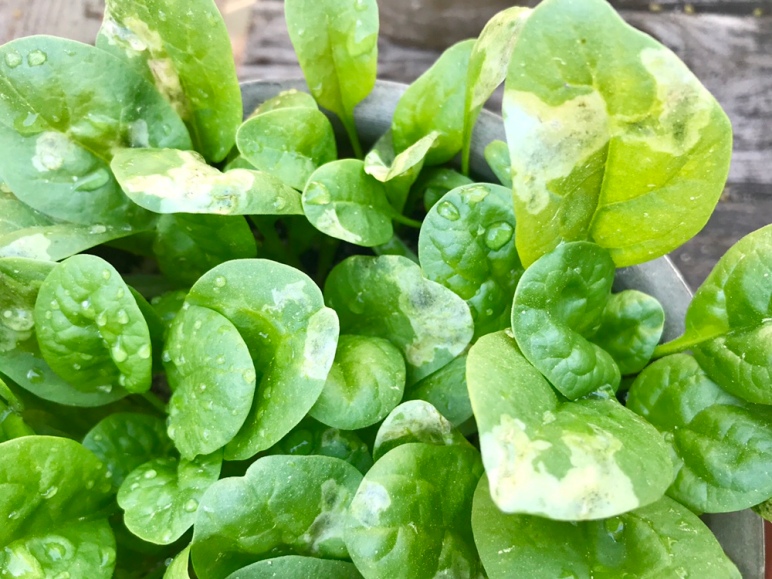
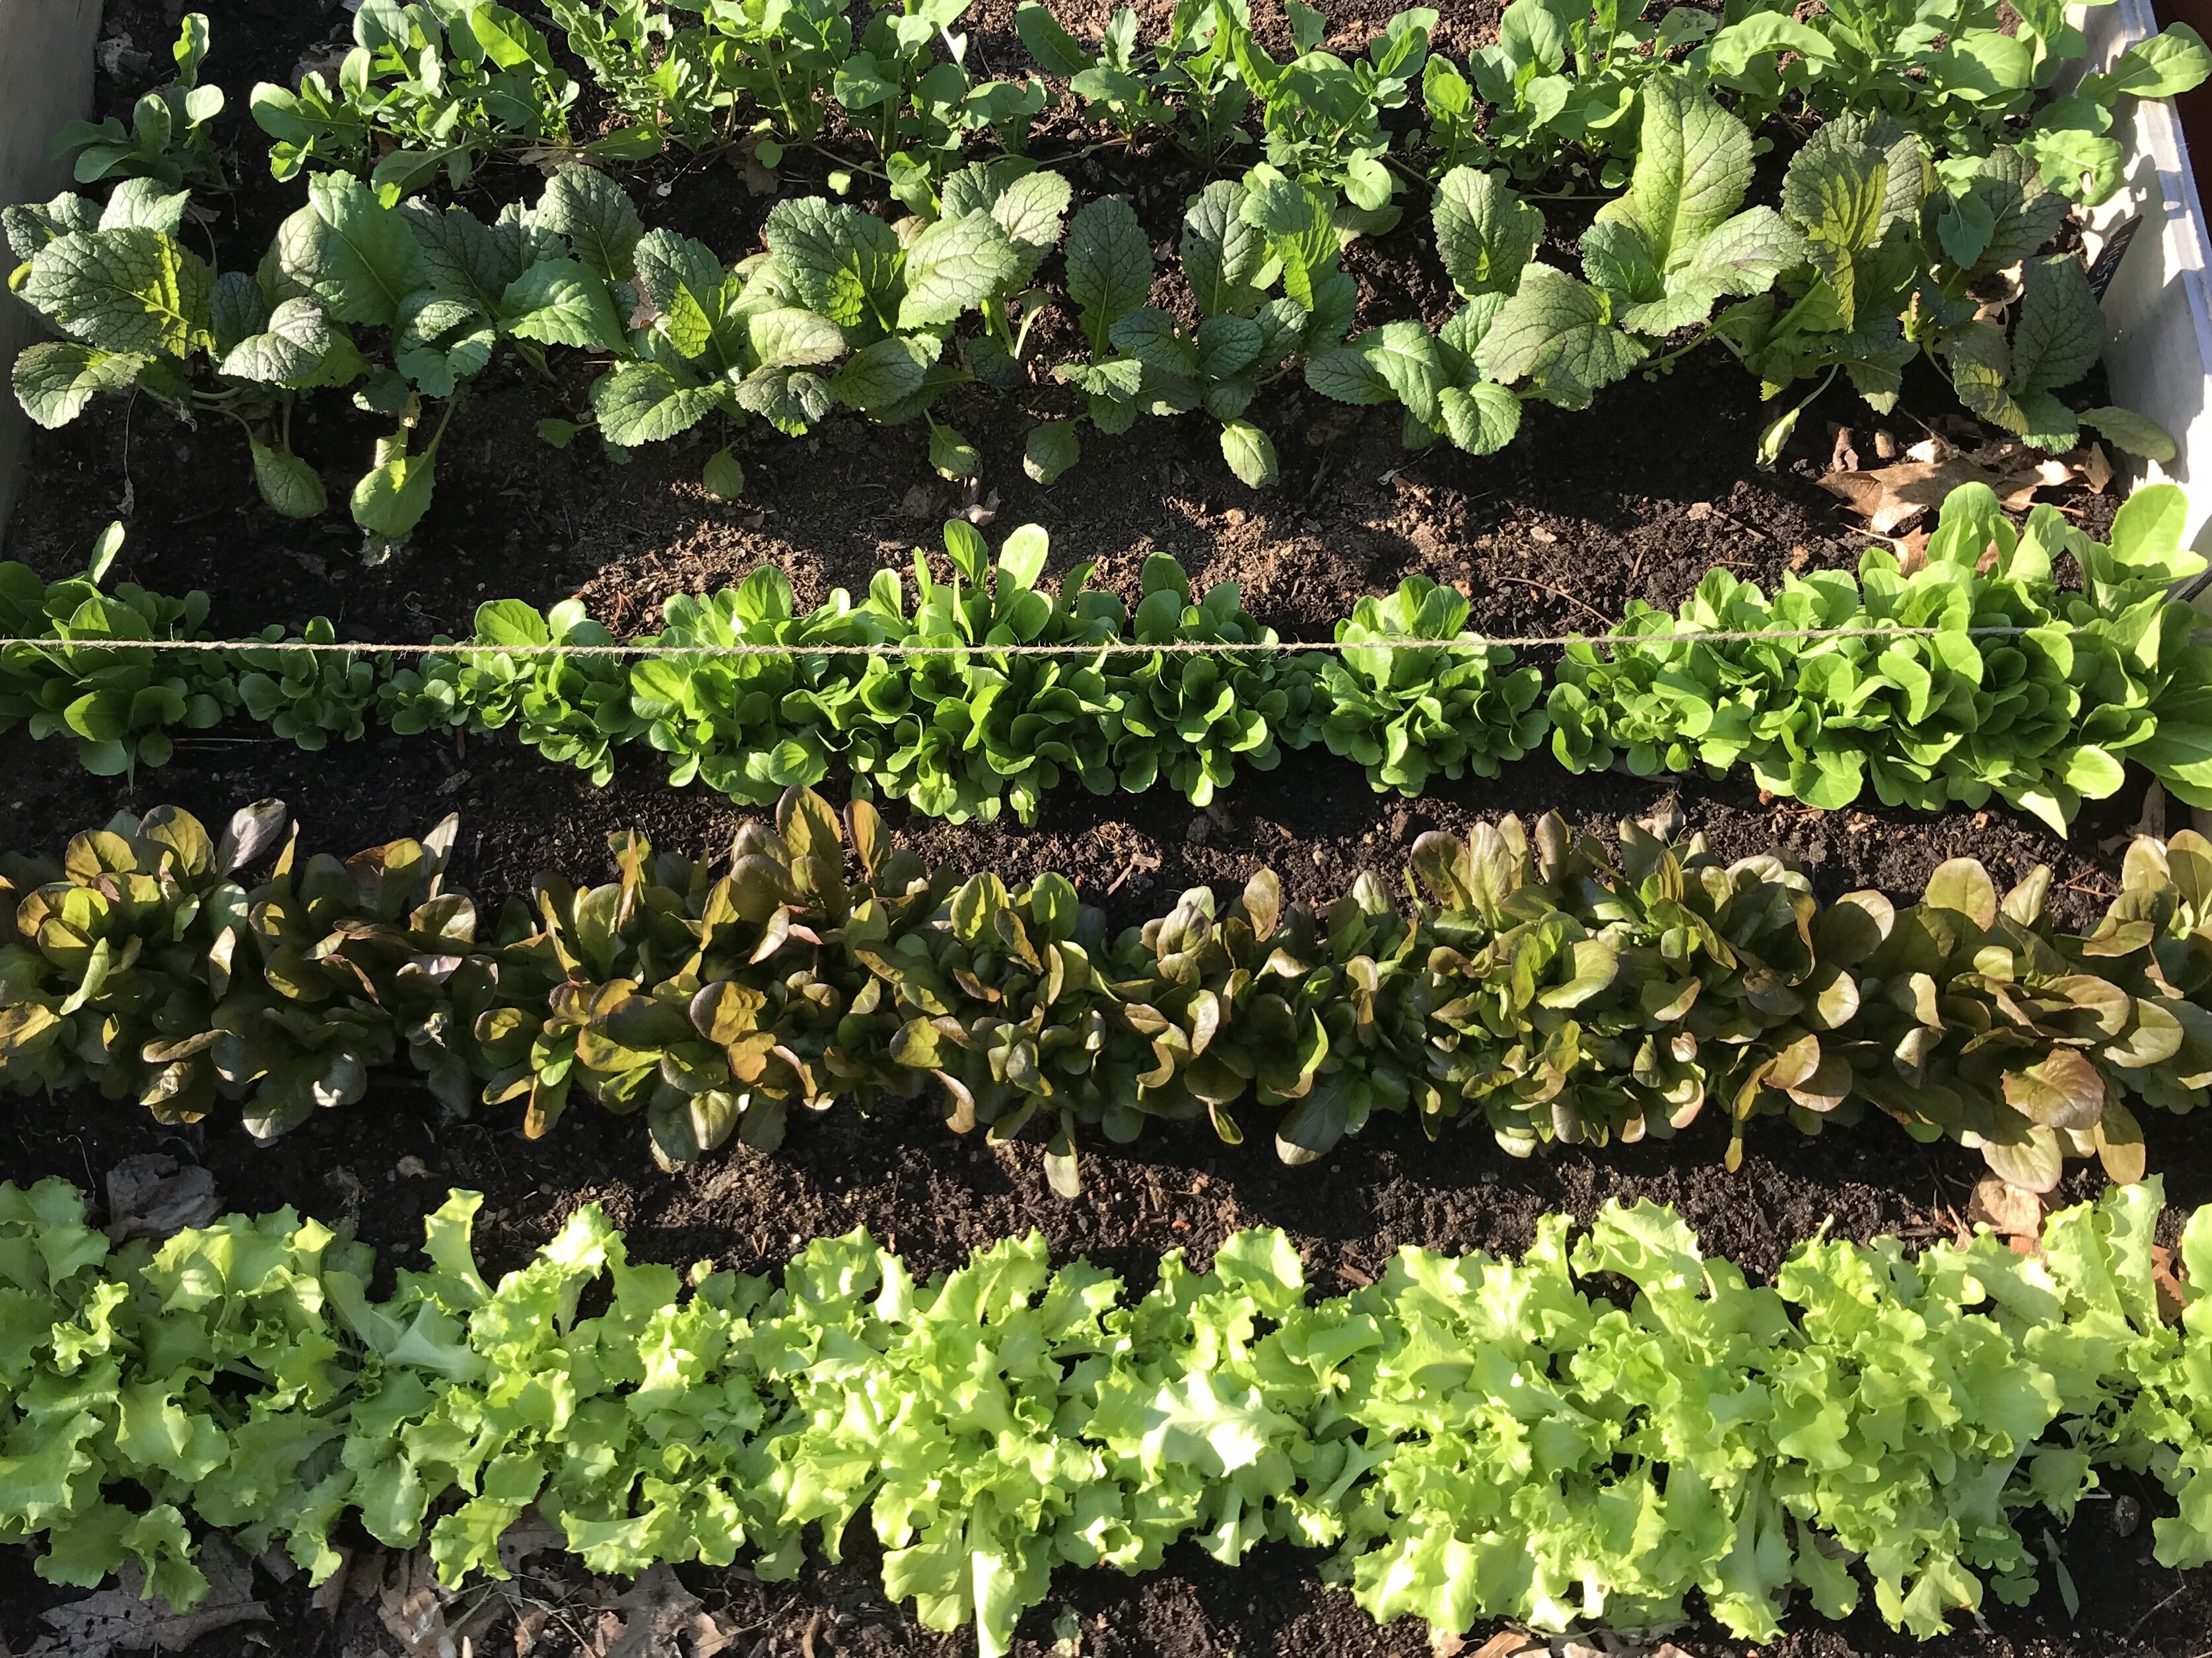
Yesterday I thinned out my lettuce rows, so I had a pile of baby lettuce washed and ready. My Grand Rapids Lettuce seeds also came from the grocery store, and Super Red Romaine and Red Giant Mustard I got from MIgardener. Starting with radishes and mustard greens, I wasn’t quite sure where to go next.

img_9512

I wanted to use mozzarella (that I had opened for grilled pizza the night prior), so I drew some inspiration from Martha. Her recipe called for Scallions, but I used Chives instead. I chopped up a whole bunch and let them steep in olive oil while I waited for the duck breasts to grill. I added just a dash of both apple cider and balsamic vinegar to my dressing, along with flaky salt and fresh ground pepper. At this point I felt like I was onto something special. I threw some fresh Basil leaves into the salad too, because I figured it couldn’t hurt.

img_9533

Duck is often served with a fruit reduction sauce, so I knew that huckleberries (as they are called here) would be a perfect compliment to our protein. Although the wild blueberries are in season, unfortunately they were pretty sparse and dried out yesterday due to the recent heat wave. Luckily, in the freezer I had a jar of berries that I picked last year. Did you know that berries are the easiest thing to freeze? You really don’t have to do anything but wash them, put them in a jar or plastic bag, and stick them in the freezer. They took almost no time to thaw out because they’re so tiny, and they tasted amazing.

  • Radishes
  • Mozzarella cheese
  • Wild blueberries
  • Baby lettuce
  • Mustard greens
  • Basil
  • Chives
  • Olive oil
  • Vinegar
  • Salt
  • Pepper

As soon as I tasted my meal, I felt it must be remembered. The sweetness of the mozzarella and the berries held up to the spiciness of the radishes and mustard greens. The fresh flavor of chives and baby greens was just the right accompaniment to the rich, perfectly grilled duck.

A magical summer storm rolled through around 11 pm and lightly re-hydrated and, more importantly, cooled off the garden. The plants grew a tremendous amount with all the sun we got, but the watering regimen was a lot for me to keep up with.

War On Bugs

I love being in my garden. Not only because it’s soothing to my soul and completely awe-inspiring, but also because I don’t know how I would ever learn anything if I didn’t actually spend time in my garden! Simply showing up to observe can be very rewarding. It’s as easy as taking notice, asking questions, and seeking answers. What I really love about gardening is that it inspires curiosity, and that there is a wealth of information at our fingertips with which we can satiate that curiosity. Take that leap into the unknown, tap into the traditions of science and all of the knowledge that has been collected before us, and participate in the exploration and advancement of life on Earth. The practice of acknowledging ordinary things occurring in nature, grants the opportunity to discover extraordinary things about nature.

I prefer to water by hand, with a 2 gallon watering can, because it gives me the chance to look at what’s going on with each individual plant on a regular basis. Even if the garden is not thirsty, I make a point to show up every day to care for my plants in some way – even if just for a few minutes. Whether that means harvesting, weeding, training vines up trellises, fertilizing, pruning, up-potting, squashing bugs, or a little bit of everything – this is always when I begin to learn.

This year I have really been getting to know my pests! In fact since I began drafting this post, I’ve had to add a few more to the list. I’m also researching how I can manage the bad bugs without using nasty chemicals or harming beneficial insects. I recently read a piece of insight from Petra of Fruition Seeds – she said, “cultivating life is curating death.” I think there’s some real truth in that statement.

So far, I’ve identified and targeted the Eastern Tent Caterpillar, the Red Turnip Beetle, Leaf Miners, the Rose Chafer Beetle, Grasshoppers, and Stalk Borers. The Grasshopper is not pictured because the damn things hop away so fast, but I have seen so many incredibly cute, baby-sized ones. And the Stalk Borer is pictured twice – because it looks different from each end.

The 3 substances that I’ve applied to my garden are: BT, Diatomaceous Earth, and Neem Oil. I won’t go into full detail about how to use these products because I don’t feel qualified to do so. Look it up on other sites and cross check info. They are organic but that does not equate with being 100% safe. They can still harm beneficial insects and need to be used with care, if at all.

What I thought was downy mildew, actually turned out to be leaf miners. I watched this video that popped up on Facebook, proceeded to walk outside to check underneath the leaves of my chard and spinach, and found those tiny white eggs. It’s too late for me to employ row covers, but I did remove lots of leaf miner eggs by hand.

Applying Neem Oil seemed to help keep them from laying more. The strong odor or flavor of Neem Oil is supposed to prevent insects from munching on leaves. Diatomaceous Earth kills all hard bodied insects. I’ve found conflicting info about these two things harming bees, but it seems like a good idea to to refrain from applying any of these treatments directly on flowers.

The only way I’ve found to prevent total grasshopper invasion is to eliminate the tall weeds that love to grow around the perimeter of my raised beds. Keeping the yard mowed also helps. One of my first mistakes with my garden was in the original design. Since weeds tend to grow up in between the outside of the beds and the fence, I tend to not weed them.

The edge area is impossible to get with the mower and therefor very difficult to keep tidy. I thought it would be nice to let the border grow up as tall meadow-y grass but that turned out to be a bad idea, because grasshoppers. I must stick my hand through every 2 inch section of fence to pull weeds from between the welded wire. Next year I really ought to manage them earlier, because I think that is how many of these pests entered my garden in the first place. Some may also come from the dead leaves that I bring in for mulch, but I have a feeling that the tall weeds are mostly responsible.

My #2 mistake was allowing last year’s plants to remain in the ground over the winter. I will definitely make a point to clean up my beds this year before winter sets in. Now that I know how to identify the presence of the stalk borer by the tiny holes that it makes, I am certain that I had it last year in one of my tomatoes. It never completely killed the plant but it must have laid eggs in the soil. Now I have more of them. I first found one in my Lily plant that just snapped off when I lightly tapped it. I saw the bug in there so I looked them up online and found out they will cause plants to wilt. Proud of myself for figuring out the mystery of my wilted tomato plant, I sliced into where I could see a couple little holes in the stalk of the next tomato that had also started wilting. Sure enough there was the head of the stalk borer – which is not uniformly patterned from end to end.

In addition to familiarizing myself with local insects – and learning which are beneficial and which are destructive, I’m also studying local weeds. My mom got me this great book: Common Backyard Weeds of the Upper Midwest by Teresa Marrone. Knowing what’s native, what’s invasive, what’s edible, what attracts pollinators, etc., are all things that can help one become a better gardener. I will continue on that topic in a future post! After all, the war on bugs seems to start with the war on weeds!

UPDATE: I didn’t want to face the music, but the stalk borer was also damaging one of my bean plants. I should have taken a picture of the wilted plant, which I’ve been noticing for some time. But upon closer inspection, you can see the holes in the stalk which are the tell tale sign. When I opened it up, I could see that this little guy had burrowed almost all the way to the top of the plant, turning the inside of the stalk to brown mush. I have one extra bean plant. I am worried about this thing affecting my whole garden, but I don’t think there’s much I can do but hope for the best.

What to do with all that mint?

Most gardeners are aware that mint is invasive and will completely take over any area in which it is planted. It creeps horizontally because it is a rhizome. So if you want to grow mint and you don’t have room for it to sprawl, I recommend planting it in a container. I have mine in a nice big planter to bring some green onto the patio. I love how it tends to overflow beyond the edges of the pot. And how I can feel free to harvest as much as I want, because it grows so vigorously. But whether you grow Peppermint or Spearmint, what do you do with all that mint?

Make Tabbouleh, of course! I don’t have homegrown cukes or tomatoes yet, but I’ve got plenty of mint, and parsley – which are the key ingredients to one of my all-time favorite summertime dishes, tabbouleh. Or tabouli? I have no cultural connection to this type of food – but I’ve always just loved it. I’m not even sure when I first tried tabouli. Maybe at the same time that I discovered falafel at Al Salaam Deli when I was at college in Savannah, Georgia? Anyway, ever since I started making it for myself years ago, I’ve put my own spin on the classic recipe. Cucumber, mint, tomato, parsley, lemon, and bulgur wheat are all givens. Imagine a lemon in the bottom left corner of the photo – because somehow I missed that styling opportunity.

img_8596

Here’s my twist: I’m a big fan of fresh garlic, and fresh ginger in my tabouli.  And celery! I usually press garlic and grate ginger in all of my cooking – but for this recipe it really makes a difference to chop by hand. A coarse mincing creates just the right size bits to integrate with the bulgur wheat and you will really taste it. Occasionally you’ll get a spicy kick from the ginger.

For the onion element, I prefer diced white onion over scallions. That ties it all together for me, for flavor and texture. Chopped celery provides an extra cool crunch, with an invigorating bite that fits in happily between the cucumber and parsley that are typical in this dish. By all means, use the celery tops too if you’ve got them – not just the stalks.  Romaine lettuce can work well too in this salad. Sometimes I just heap some tabouli on top of lettuce.


Of course I also chop up a significant amount of of mint and parsley. I use curly and flat if I have both on hand, but I would definitely choose curly if I had to pick only one – again it’s all about the texture. And proportions. I make this more of a green salad than a bulgur salad. Then add the juice of a lemon, some E.V. olive oil, diced cucumbers, tomatoes, and fluffy bulgur wheat. The tiny particles of onion, garlic, ginger, and bulgur collect in the ruffles of the curly parsley, perfectly dripping with lemon juice and olive oil. I like to throw in some cumin and coriander along with salt, and lots of pepper. Lastly, you absolutely have to let it chill for at least an hour – or even better, overnight. The flavors meld together and create something far superior to the sum of the parts. But here they are:

  • Diced Cucumber
  • Diced Tomato
  • Diced Onion
  • Chopped Celery
  • Chopped Romaine (optional)
  • Chopped Mint
  • Chopped Parsley
  • Minced Garlic
  • Minced Ginger
  • Bulgur Wheat
  • Olive Oil
  • Lemon Juice
  • Cumin
  • Coriander
  • Pepper
  • Salt


img_8624

It may be just as good with a food processor, but I doubt it. For me, it is worth all of the time and effort that it takes to prepare this dish one ingredient at a time. There’s something about handling each of these fresh ingredients that improves my mood and inspires me to eat more simple, fresh, unadulterated food. It’s almost as if the flavors chemically alter my composition, causing me to crave more healthy food. Plus it’s something you can make in large quantities because it keeps well in the fridge or cooler. Let me know in the comments if you try my version or a variation of your own!

Bacillus Thuringiensis vs. Malacosoma disstria

To be clear, this is a battle not a comparison. A war between me and the tent caterpillars, the most destructive garden pest that is known to get into my fenced-in raised beds.  My weapon of choice is BT (Bacillus Thuringiensis), a microbial insecticide with caterpillar controlling capabilities. It is totally organic and doesn’t harm humans or any beneficial insects. Luke from the MIGardener channel mentions in this instructional video many other types of pests that are affected by this bacteria.

I am targeting Malacosoma disstria, or the Eastern Tent Caterpillar. These pictures are from last year, but I’m seeing the same thing all over again. They are prolific in my yard – and the whole county from what I can tell from seeing so many silk tents around. They damage the leaves of most of my plants including Brussels sprouts (especially), cabbage, broccoli, kale, chard, arugula – I’ve even seen holes on the beans and peppers. I’m not that bothered by the holes but the plants do get a little stressed.

This method worked well last year, but I can’t remember what ratio I used – hence the need for this blog! Today I’m mixing up a fresh batch with 2 tablespoons of concentrated BT to 1/2 gallon water. I don’t even need to fill my 1 gallon sprayer to cover my entire garden and the surrounding area. Last year I could actually see silk tents in our backyard. This year I am just finding the very hungry caterpillars crawling all around. I sprayed some of the surrounding trees for good measure.

I’ve learned a few important things to remember when spraying BT. First, rain and watering washes it off. So spray accordingly, and reapply. Second, sunlight weakens the impact, so it’s best to spray at sun down. And lastly, the shelf life is limited. A week or so ago, I sprayed the solution that was leftover in my sprayer from last year. It didn’t seem to help at all. When you apply BT properly, the results are noticeable on all new growth. If this application is ineffective, then I will know I need to purchase a new bottle of concentrate.

Last Spring Frost Date

Of course it’s important for gardeners to pay attention to the weather all season long, but today is the last Spring frost date. According to the Farmer’s Almanac, the probability of frost occurring after today is 30 percent. More extensive data is available from the National Climate Data Center if you are into that kind of stuff, but it’s generally safe to put tender plants in the ground now. It was indeed quite cool last night, down to 41 degrees or possibly lower at our house. Since my raised beds are fenced in, it’s relatively easy to drape a great big tarp over my entire garden. This works extremely well as a temporary greenhouse which really helps to improve results with such a short growing season. I’ve got just a little over 3 months until the first Fall frost date.

A couple of days ago, I noticed one of my tomato plants was not looking good at all. The top half was totally wilted and keeled over, but the bottom leaves looked fine. The plant had been looking great for a whole week, so I don’t think it was transplant shock. We did have some cool, wet weather, so it might have something to do with that. Unfortunately my 3 varieties of tomato plants that I started in mid-March got mixed up, so I’m not even sure which type of tomato it was that died. I’m pretty sure Bonny Best and New Yorker are well adapted for the North. Black Brandywine is supposedly a little more high maintenance so perhaps it was one of them. I’m excited to see if I can tell the difference between them when they mature. They all smell so good!

img_8417

I don’t know much about diagnosing tomato diseases but I read a little bit about bacterial wilt, and two other causes of wilt caused by fungi, Fusarium and Verticillium. I’m not totally convinced that any of those are the cause, so I will try to replant since I have plenty of extras. If the same thing happens again then I might start to believe that there’s a disease in my soil. I am of course hoping there’s not, and that nothing spreads to the other plants.

I went ahead and put my collection of chili peppers in my new raised bed! Ring of Fire, Buena Mulata, and Shishito, all started from seed, plus Super Chilis that came from last year’s harvest. This bed is not fenced in like my larger raised beds, so hopefully the critters behave. Since these are planted somewhat close together, I did not prune them. But I am experimenting with pruning my potted peppers to make them grow larger and bushier, and hopefully more bountiful. 2nd photo shows a plant that I pruned last week, now branching out. 3rd photo shows a young plant freshly lopped off.

I have been pinching off flowers and buds from my tomatoes and peppers. I think they should become a little more established before expending resources to bear fruits.

Mulching & Downy Mildew

I was checking on my patio-container plants today and discovered light colored splotches on my Spinach and Swiss Chard. The internet leads me to believe it’s Downy Mildew – which is not a fungus like the White Powdery Mildew that appeared on my Zucchini last year. It was cool last night – below 50, and the patio is quite shaded by our house and a lovely maple tree. It’s also somewhat protected from wind. Since this mildew thrives in moisture and cool temps, I moved my patio containers to a much sunnier, and breezier, area near the rest of my garden. Hopefully that should take care of the problem.

I would like to get some wood chip mulch to keep the grass and weeds from coming up in the center of my horseshoe raised bed enclosure, but when I say “mulching” I mean I went ahead and spread dried leaves all over my garden. All around everything in the raised beds, the potted peppers, and the cucumber in its large container. Mulching is so great because it insulates the ground to keep my plants’ roots warm at night, it helps keep the soil moist so I barely have to water – about once a week is normal, and it prevents weeds from sprouting up so I barely have to pull weeds. I’m also convinced that it increases worm activity which is always a good thing. It’s not the most attractive mulch but it’s free and works really well! I only avoided spreading the leaves on the area where I sowed seeds because those sprouts aren’t big enough yet to clear the height of the leaves. Lettuce, Radishes, Beets, Carrots are all sprouted. One thing that has yet to come up is the Onion seeds.

Even some of my Asiatic Lily bulbs are poking up green in the new mixed herb/flower bed! Another exciting day in the garden.